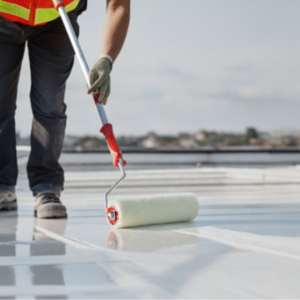
5 Mistakes to Avoid While Painting Metal Surfaces
We all know that painting metal requires more precision because it is smooth, non-porous, and more prone to rust. Metal surfaces are found in industrial equipment, automobiles, infrastructure, household items, and many other applications. Since we use metal in so many areas of daily life, proper cleaning, priming, and painting techniques are crucial to ensure long-term protection.
People commonly face issues like peeling, rusting, and poor adhesion. In this article, we’ll explore the topics,
- Why painting metal requires special care
- 5 mistakes you must avoid while painting metal surfaces to achieve a long-lasting, professional finish.
Why Painting Metal Requires Special Care?
Continuous exposure to air, water, and air pollutants makes metal highly susceptible to rust and corrosion. Over time, these factors weaken the metal and shorten its lifespan. Applying the right primer and paint helps stop this deterioration and increases the durability of metal surfaces. A well-applied paint system protects the metal, keeps it looking fresh, and shields it from environmental exposure for years.
5 Mistakes to Avoid While Painting Metal Surfaces
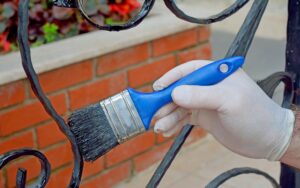
1.Skipping Proper Cleaning and Degreasing
Many people think wiping the surface before painting is enough. But in reality, metal contains invisible contaminants like factory oils, machining residues, fingerprints, rust, and dust. These contaminants prevent proper paint adhesion.
If you paint without proper cleaning,
- The paint doesn’t adhere properly to the surface, leading to peel-off.
- The finish becomes uneven or patchy.
- Defects like fish-eye appear due to oil or grease.
How to Fix This Problem?
- Use a degreaser or solvent cleaner.
- Rinse thoroughly and let the surface dry completely.
- Use a lint-free cloth to avoid fibres sticking to the wet paint.
Real Example
A homeowner painted a metal window grill near the kitchen without cleaning it properly. Oil vapours from cooking had accumulated on the grill, along with outdoor pollution. Within two weeks, the paint near the hinges started peeling. After using a degreaser and repainting, the finish lasted for years, and oily patches on the grill disappeared.
2.Not Removing Rust Completely Before Painting
Rust is a reddish-brown flaky coating, another form of corrosion. If you paint over it, rust will continue to grow underneath the paint film until the coating cracks or bubbles.
Why Incomplete Rust Removal is a Problem?
- Rust spreads faster in humid environments.
- The paint loses adhesion and falls off.
- The metal gradually weakens.
How to Fix it?
- For light rust: use sandpaper or a wire brush.
- For deep rust pits: apply a rust converter primer.
- Always apply a suitable primer after rust removal.
Real Example
A workshop owner repainted a metal gate but ignored deep rust pits. After one monsoon season, the paint bubbled and peeled. When inspected, the rust pits were still present beneath the paint. After removing all rust and applying rust converter primer, the problem was resolved.
3.Using the Wrong Primer (or Skipping Primer Entirely)
Metal behaves differently from wood; it does not absorb paint. Primer is essential to create strong adhesion between paint and metal.
Why the Wrong Primer Causes Problems?
- Paint doesn’t bond properly with metal.
- Metal becomes exposed to moisture and begins to rust.
- The topcoat loses gloss, durability, and appearance.
How to Fix This Problem?
Choose the primer based on the metal type:
- Etching primer for aluminium and galvanized steel.
- Red oxide primer for iron and mild steel.
- Epoxy primer for strong adhesion and chemical resistance.
- Zinc-rich primer for heavy-duty corrosion protection.
Real Example
A customer painted a balcony railing with enamel paint but skipped primer. It looked glossy initially, but within one month, small areas of paint chipped off where people held the railing. The customer contacted us. We guided him on using the correct primer. After using our Epoxy ZN PH Primer followed by Metalcoat Two Pack PU as recommended, the adhesion problem was solved, and the coating lasts longer for years with classy aesthetic look!
4.Choosing the Wrong Type of Paint.
Using wall paint or low-quality enamel on metal results in poor adhesion, fading, cracking, and weak rust protection.
Why the Wrong Paint Creates Problems
- Metal needs paints with strong binders for long-lasting adhesion.
- Some paints react with UV light or environmental pollutants.
- Water-based paints fail to adhere to unprimed metal.
How to Fix This Problem?
Use paints designed for metal:
- Acrylic or PU Paints for smooth and durable finishes.
- Epoxy paint for industrial use.
Real Example
A person repainted his iron garden chairs with leftover wall paint. The paint dried soft and sticky, collected dust, and peeled off with a fingernail. After using Epoxy ZN PH Primer and Metalcoat Two Pack PU paint, the chairs withstood sunlight and rain for years and still look new!
5.Poor Application Technique
Even with correct cleaning, priming, and paint selection, poor application can ruin the finish.
Common Errors in Application
- Applying thick or thin coats.
- Not allowing enough drying time.
- Painting in direct sunlight or high humidity.
- Using dirty brushes or rollers.
- Painting in a dusty environment.
Impact of These Errors
- Thick coats cause dripping and sagging, and thin coats cause hiding and performance-related issues.
- Poor drying leaves the paint soft and sticky.
- Sunlight dries paint too quickly, leading to poor adhesion.
- High humidity traps moisture, which leads to blistering and peeling.
- Dirty tools leave marks and an uneven finish.
- Dust causes a rough surface, bubbles, and premature failure.
How to Fix This Problem?
- Apply 2 to 3 coats in the recommended thickness evenly.
- Improve ventilation and allow proper curing time.
- Paint in shaded, controlled conditions.
- Use good-quality brushes and rollers.
- Clean the room before starting the work.
Real Example
A metal fabricator applied thick coats of paint to steel window frames. The surface looked glossy at first, but sagging lines and orange peel texture appeared later. Some areas remained wet even after 72 hours. It would have been prevented if applied with the recommended thickness, which could deliver a smoother, defect-free finish.
Conclusion
Metal painting is not difficult, but it requires the proper surface preparation, primer selection, and application techniques. If you are planning to paint your metal surfaces, feel free to contact us. Our team will guide you with the right products and technical advice.
Frequently Asked Questions.
1. How to Paint Metal Correctly?
First, clean the metal, remove loose paint and rust, repair dents or holes, apply the recommended primer for the type of metal, and then apply the recommended topcoat for long-term protection.
2. What are the 5 Defects Found on a Painted Metal Surface?
You may observe peeling, rusting, blistering, poor adhesion, and uneven finish on a painted metal surface.
3. Is Vinegar Good to Clean Metal Before Painting?
Yes, vinegar can clean metal before painting by removing light rust and grease, especially if you have a low budget. But cleaning the metal with the thinner is highly recommended.